At The Front Door

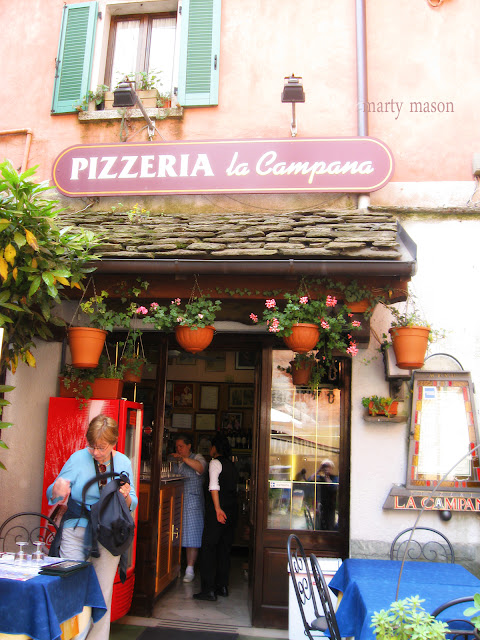
Here's looking at you....front door!  What was I thinking?


An Italian front door
 
I'm thinking the concrete boxes are actually the walls to the outdoor carport!  Italian style.  They drive the cutest little cars there and at the end of the day they just pull them into the tightest little places...not even looking back, they lock up and head into their homes.  That's what I'm thinking ~ that might happen at this front door. 


and every garden has an entry in Italy,,,at Lake Orta

and every garden has a front door...I just wanted to pick the lock to this front door, stroll around and enjoy the beauty I envisioned was behind these rock walls. 


The busier the front entry, the more inviting
 
The busier the front door, the more inviting.  So much to see, you just had to step in to enjoy the fullness of the small space beyond the front door. 


Do I go or do I stand here and think about it - at the front door. 
 
 
I haven't made it out my front door yet....but I'm getting there! 


About binding a quilt ~

I'm bound and determined to get the binding right!  That is...right to suit me. 

I've been told so many things that must be considered in making the binding selection....it's no wonder my head is in a spin.  Some quilters say the binding fabric must be in your quilt top somewhere.  Some say it must match the front of the quilt and some say it must also match the quilt back.  Some say this, some say that!  Wait a minute...I don't have that much time on my hands so I just audition a few fabrics and make my selection based on what pleases me. 

I got my Streak of Lightning quilt back from one of my favorite long-arm quilters the other day. 


Streak of Lightning quilt....lots of half-square triangles


and set about deciding on the perfect finish:  the binding.

I first auditioned the red which I really liked but woe be the fabric stash...did not have enough. 


So, I moved on to the yellow and green stripe.  Very interesting!  I like this one too. 


Trying just one more....the yellow with a bit of a design became my binding of choice.  I can hear the quilt critics already shouting over the heads of each other to get the last critical word in.....

In spite of all that noise, this one wins out.  It's making me very happy....and this morning, that's all that counts. 


And another of my favorite bindings:  A black and white stripe....to frame my painted/stitched on Koi.  I am so inspired by the minimalist fabric and quilt designer, Yoshiko Jinzenji.  I stamped and painted to make my own fabric for this art quilt to meet the "Out of Asia" challenge for  Art Quilts Around the World.  


And the many colored bubbles was in the mood of my self-portrait!  Also a challenge quilt for Art Quilts Around the World.

 
This orange corn was just the perfect choice to finish off my improv curve art quilt. 


Every now and then, I will add a more subtle binding! Here's one....a green on green for Ribbit.  Since it was donated fabric and I had plenty of it....why not use it in the quilt AND in the binding.  As a matter of fact, it's on the back of the quilt too!  What's not to love about free? 

 
and another....orange you glad!  It's a two color quilt, so I had no reason to add a third color.   You see, sometimes I follow the rules....sometimes.


Another great week ahead. 


A Churn Dash Work-in-Progress

I've been spreading myself thin....now, there's an oxymoron if there ever was one!  Let me re-phrase that and get back to my original train of thought!

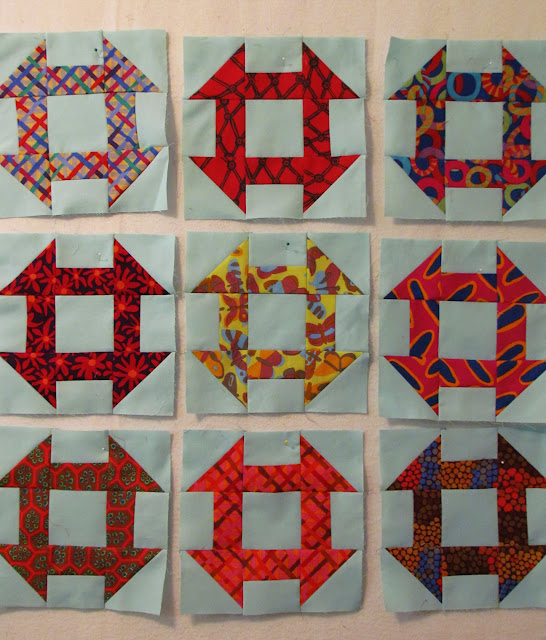
My time has been spread thin these past few days on several different  projects.  I did get enough of one project completed - my Churn Dash Quilt - to get a few pictures this morning.  I selected some delicious  Brandon Mably and Kaffe Fassett fabrics along with Kona in aqua for my Churn Dash.    Here are  9 blocks of 42 on the design wall. 

two-fabric churn dash blocks using Brandon Mably, Kaffe Fassett and Kona aqua


I decided on 9 1/2" blocks....here's how I make a two-fabric churn dash quilt block: 

I have a very simple method of determining the size to cut the squares for a half-square triangle block.  First, determine the size of the finished square...in this case, it is 3".  To that add 1".   I therefore will cut for each of my churn dash blocks, two background fabrics and two focus fabrics at 4" square.  Lay the background fabric and focus fabric rights sides together.  Draw a diagonal line corner to corner on the background fabric.  Sew 1/4" on either side of the drawn line.  Cut on the drawn line.  Press to the focus fabric. 

With my square ruler, I lay the diagonal line of the ruler on the diagonal line of the HST and trim my block to 3 1/2".   It takes a little more time, but each one is perfectly square using this cutting and trimming-rule-of-thumb.


Now to make the bars that separate the HSTs....Again, I determine the number and size needed for my block.  I know I need four bar blocks and I know they need to be 3 1/2" square.....so, again, allowing myself fudge room for trimming, I cut background and focus fabric strips at 2 1/4" x 16".  Sew the two strips together, and trim to 3 1/2".  The background will be 1 3/4" as will the focus fabric for a perfectly symmetrical 3 1/2" block.  Now, sub-cut into (4) 3 1/2" blocks. 

 
Lay out in this order

and sew block to block, then row to row


for a completed two-fabric churn dash block


Next we'll add the sashing between each block.....
two-fabric churn dash blocks using Brandon Mably, Kaffe Fassett and Kona aqua


Another day.....


You don't use that black sticky tape.....


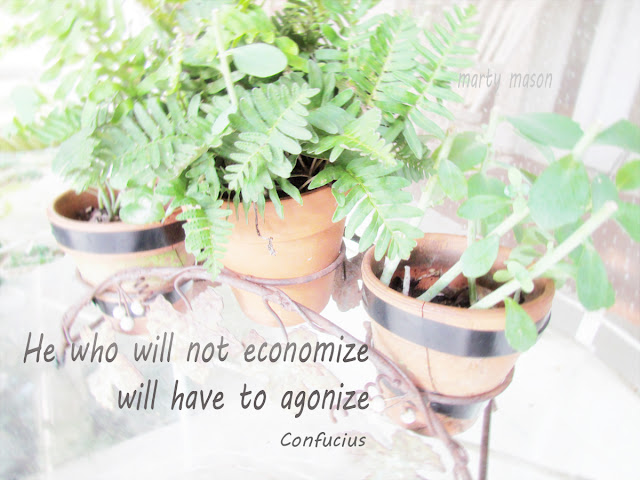
Why not?  It's just perfect for some projects.....sticks things together better than glue.  So, when my little clay pots began to crack (and there was no replacements in the potting shed), I grabbed the roll of black plumber's....or is it electrician's.....tape.   And,, there you have it. 


when little clay pots crack, generously surround with tape!


Confucius....there's no agony in this back garden! 


confucius say


Lyrics To Live By~


Happy Father's Day from me to you ~ husband dear!

picture taken on our last visit to Natchitoches, Louisiaina


Being a little bit shy!


Distracted by the littlest things ~

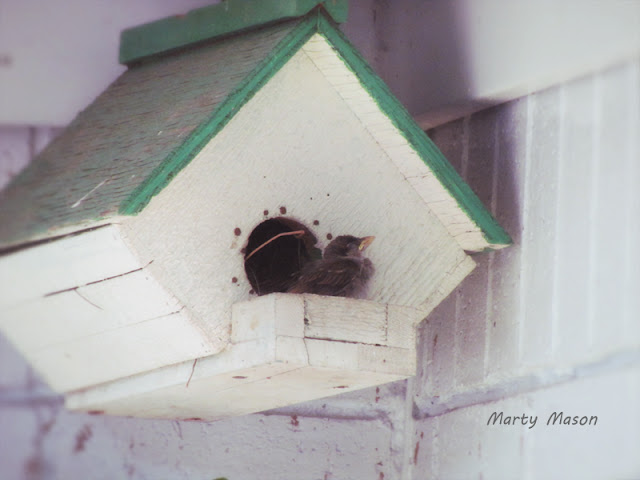
We've decided that the Sparrow bird is a hoarder!  She continues all through the spring and into the summer....well after the eggs are laid, sat on and baby birthed....to add twigs and other stuff to her nest.   And, the only reason I can figure is that this is her way of forcing the birds out from under her wings. 


Sparrow Babe


Thankfully, the house had an open porch for the babe to rest after the twigs and stuff pushed it out the door!

Sparrow Babe
 

Sparrow Babe


Fly baby, fly....please!  It's not that I don't care about your well-being....but,  I need to get some rest.


Sparrow Babe

Just because it was there!

The day's almost over and I've just gotten my second wind. 

I know that just because the little piece of fabric with the design printed on...you know the kind.....was in my souvenirs-from-the-past-drawer, that I didn't have to act on it.  Some are printed with a teddy bear, some an elephant or giraffe, but in my case, it was "Scarlet" the doll.....with the dotted line drawn around  the printed pattern where the fabric is to be cut  You do know that just because you have scissors and stuffing and a bobbin filled with just the right color thread, that you don't actually have to make this little stuffed thingy.  You do know that.  Don't you?  So, do I.   

I've been shuffling this little pattern around for months.  Ever since Austin....QuiltCon.  I spun the wheel to get a prize in the Spoonflower booth and this was my prize.    It only took me a little while to cut, stitch and stuff. 

She's soooooooooo  darn cute. 

Cut on the dotted line, sew, stuff and enjoy


In These Colors

In shades of blue ~

Chip out of every block in shades of blue....A Karen Combs design
 
 
 In shades of brown ~

Chip out of every block in shades of brown....A Karen Combs design

In shades of lime green ~

Chip out of every block in shades of lime green....A Karen Combs design


What a time a group of us had yesterday working with a Karen Combs design "Chip Out of Every Block."  I made three blocks and got them stitched together and bordered, ready to quilt to enhance  my dining room table décor.   Finished at 14" x 43". 


Chip Out of Every Block


ColorBoard No. 27 - A quilt block


No time for sewing this morning....so a ColorBoard it had to be:  A Quilt Block ~


ColorBoard No. 27:  A quilt block


Once upon a time I had a quilt block and I loved all the colors in it......so, in Photoshop,  I simply went to file....new, added my quilt block picture to that open file and moved it around to my liking.  I then  found my eyedropper tool and selected a color from the quilt block,  then selected a brush tool and painted that color on the picture.  Next step was to open a new layer, select a color, then a brush and do the same thing all over again.  Adding a new layer for each color, allows me to move my paint splashes anywhere on the picture I choose.  All done, now just merge all the layers, sign my name, resize  and save. 

Shut this baby down and scoot on out of the house.   It's gonna be a full day! 


I sewed for me!


The past few days have been spent at a birthday hamburger cookout and selling raffle tickets for the Peach Festival raffle quilt  and presenting two programs for quilt guild and finishing quilts for community service.   All, fun; however,   I told the HUmAn last night that I wanted to spend today doing nothing more than sewing for me.  And sew I did. 

Once a month, Pile O' Fabrics and Sew, Mama, Sew! give us the big block BOM.    June's  block "The  Pieces"  is out and it is a great one. 

Here's my 24 1/2" block, completed with two pieces of  Amy Butler's Alchemy fabric.  Hers is the white floral and the aqua butterfly.   I added a scrap of Zen Chic's Comma and a piece of  delightful Keiko Goke out of Japan - yellow with aqua and lavender spirals on the bottom row.    The only fabric I could find that would blend and/or contrast with all these fabrics was the lavender for the sashing and border.  I like it!

"The Pieces"  Sew, Mama, Sew! BOM 4


And, here is "The Pieces" with my other three big blocks.  I think there will be six in this BOM quilt-along and I'm really thinking I'll put all of my blocks together for one quilt top. 

 Sew, Mama, Sew! BOM 1,2,3,4


Let's Talk About Modern....


Ramona and I were invited to talk about the modern quilt movement at a local quilt guild last night.   As in any group, the reactions and opinions were diverse.    Some members were excited and could hardly wait to see what we had in the bag:   


and wanted to talk more about the modern quilt guild movement


Some gave it the .....'we'll wait and see' approach....making no commitment for fear of retribution from fellow traditional quilters.   Remember, we are a part of the country that is known as "We Are The Bible Belt and We are Traditional Quilters and We Don't Do Art Quilts Either"  (spoken in one breath in one sentence and no...this is not a run-on sentence!) 


Some were almost rude, never making eye-contact with any of the quilts on display or the speakers.  yawn -  yawn -  ho hummmmmmmmmmmmmmm. 


One was very open in admitting that she did not like nor enjoy anything about a modern quilt.  Take it away.  Away, I say! 


Most were open-minded with eyes and ears alert....eager to learn more about modern fabric, modern quilt patterns, improvisational quilting,  negative space, minimal color, maximum color,  on-line resources and modern quilt books and magazines.  Most seemed to enjoy the show of how traditional can be incorporated into modern to achieve a stunning modern quilt that doesn't go over the edge.   Most  seemed to enjoy the program. 


I hope Ramona and I opened the door for more conversation and interest about the modern quilt movement and how it is gaining momentum here in Louisiana.  We so enjoyed being invited and had a most delightful evening with quilters who are adamant about having fun all wrapped up in a quilt. 


and so I mused! 


Day 2: Tuesday


It took me a few minutes this morning to get this photo collage put together using my photoshop tools:  I thought it was fitting for Tuesday. 


Padua, Italy


Padua, Italy
Just a bit of picture editing to get rid the autos.  I didn't want them to distract from the beauty of the red brick walls behind the marble columns.  At the same time, I wanted the focus to be on the girl pacing as she talked on her  phone. 


Padua, Italy

I had to really edit and scrunch the tour schedule.  This was day two in Padua, Italy....May, 2012.


I don't remember where this picture was taken, but I found it to be an interesting background.   Now, I'm off for breakfast and exercise and meeting up with the Tuesday quilting group for a day of catching up on all things good to lift the spirit high to the sky.   


It's My Space:

It's my space....I'll fill it with what I want:   

Cats in a stand-off!


I'm not always sure why a street corner or people or buildings or a doorway, window, or even a cat might catch my eye.  Often times I get home and delete many of my pictures of the day.  But then, sometime, I just leave them here in my space to enjoy on a rainy morning or afternoon, to edit on a whim, to allow them to mean more than being just a picture. 

On a street corner in Austin, Texas
 
Corner Space:  Stop, Look and Listen


Signs of the time:  Where street signs get more attention than homeless.


Puttin' on the Ritz
 
The Ritz in Austin:  Before
The architecture and construction of these old buildings have
withstood the years of use and abuse


Puttin' on the Ritz
 
Still Puttin' On The Ritz
Still historic after all these years


The shed:  Has not received pristine care - But it's window and door alterations caught my eye.
The Brick-Over! Never mind that the bricks didn't match the original.....they filled the space!
and that's what I'm doing this morning
It's my space


The shed: