Still basking in the Quilt Con glow:

Just a few more of my favorite quilts ~~~~~

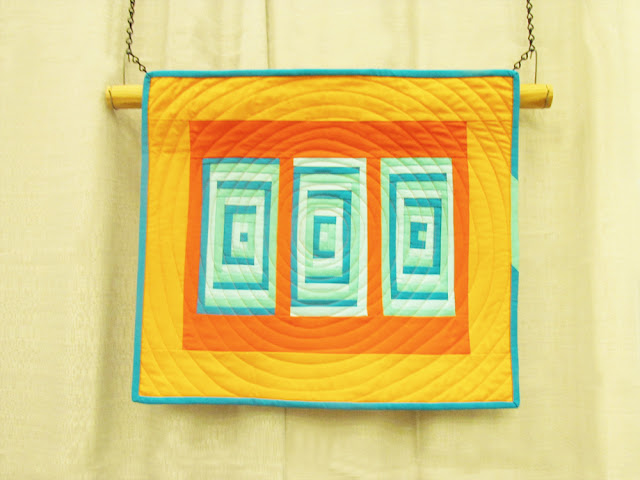
Made by Silvia Glauback, Chapel Hill, NC pictured at Quilt Con 2013

Small is smashing.  Silvia Glaubach says her quilt was inspired by the traditional log cabin quilts.


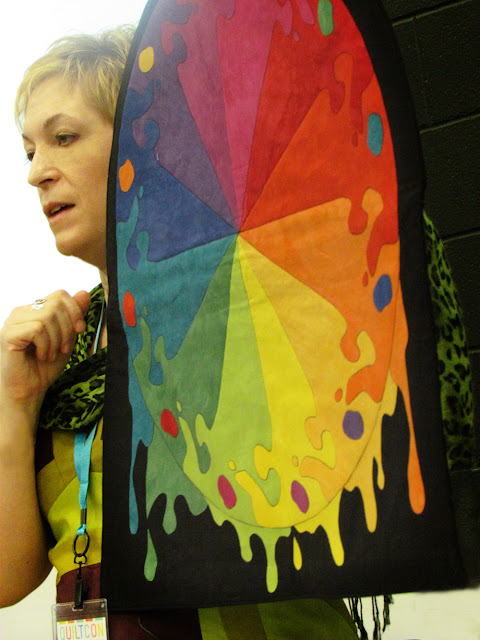
Cherrywood Fabrics color wheel

 Karla Overland dressed for the part....her dress made with her hand dyed fabric and a Vogue pattern.  But the point of the picture is her color wheel:  of course, made with her beautiful hand dyed Cherrywood Fabrics


Here's a little beauty made by members of the Anchorage Modern Quilt Guild.  I think I would name this one  "Mama That Wonky Pinwheel's Touching Me"


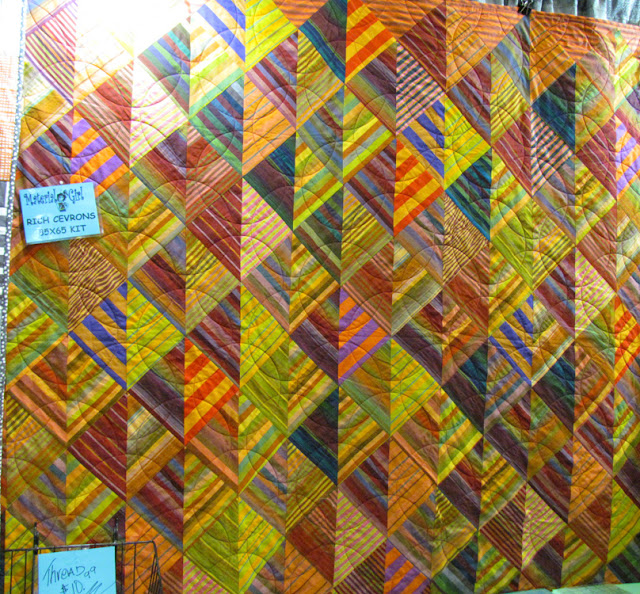
Kaffe Fassett stripes

And what's a quilt show without Kaffe Fassett:  Stripes, Yipes!  A kit available 


Violet Craft of the Portland, Oregon quilt guild is a fabric designer for Michael Miller Fabrics....and this is her Madrona Road fabric put to the test.  It tested out beautifully as pictured in the Michael Miller Quilt Con booth.


Thoughts from Thomas Knauer...a simple concept

Asbury Quilt:  Anover Fabrics:  A Smashing Quilt:  Simple Concept:  Thomas Knauer:

Asbury Quilt by Thomas Knauer


One thing I learned in the Greg Case and Elena Morera photography tips demo at Quilt Con was to never cut the borders off in the picture of a quilt!!!  But cutting the border off this great quilt by Thomas Knauer  didn't stop me from using it in this post.

Thomas used the simple idea of making two patchwork blocks, cutting the sewn block diagonally, then sashing the triangles.  Now, is this traditional or modern quilting.  Does it matter?  

I wonder, am I a traditional quilt maker or a modern one.  Whose ego am I trying to boost?  Mine?  Does calling myself a modern quilter make me any younger?  Does the tag 'traditional quilt maker' mean that I am old-style?   You know what, this morning, I really don't care what you think of me or my quilts.  I love what I  make regardless of the style.  And, if I don't love it, then I just cut it up and start all over again!

How about you?   Do you make quilts that please yourself or do you make quilts that you are sure will fit nicely into a slot that might please others?   Whatever makes you happy, makes me happy for you.  Just don't pooh pooh my quilt or my style (with all the imperfections) just because it isn't yours.  


Modern Quilt Con Madness

Quilt Con was just a blast.  It will take me many days to review all the pictures I took of those beautiful modern quilts.  What an inspiration all the folks were.  Shopping, yes, I shopped:  a bunch!  Quilt kits, fat quarters, yard bundles, vendor giveaway treasures....and (humming a happy tune) my newest sewing machine.....a Juki.

Double Edged Love made by Victoria Findlay Wolfe
 I'm seeing a lot of traditional double wedding rings here, made modern with a large dose of Jay McCarroll's Center City, a modern quilt fabric for Free Spirit.


Close view of Kathy's hand stitching in Fresh Plus 


There were two demo areas with great demos on the half hour from 10:30 - 5 the four days of the modern quilt show.....I took in 10, one of them being a "how to make a fabric sketchbook by Heather Ross.  Heather is the author of "Heather Ross PRINTS" - a book I couldn't resist buying.


Another great demo by Heather Jones was all about strip piecing.  Here's just one example of strip piecing with 4" strips.  

 The cutest personality.....Ava on the right assisted both Heather Jones and Heather Ross with their Demos. It took the efforts of many folks who donated many hours to get these demos synchronized and I thoroughly enjoyed every minute of the ten I viewed.


 I found Valori Wells helping in the Stitch Lab booth. 


Katie Pedersen (Sew Katie Did)  and Jacquie Gering (Tallgrass Prairie) demonstrated the slice and insert improvisational block making technique.  


and probably my favorite demo of all was Kat McTee's stamp carving and textile stamping demo.


and my favorite place to rest and refresh was the Michael Miller booth where the scenery changed  each day.  They provided the quilt show guests with fabric swatch handouts, chocolate, water and a beautiful place to sit and gawk at all the surroundings.


A perfect example of traditional quilt blocks in a modern setting.  Love those quarter square triangles!


 A little thing that made me smile


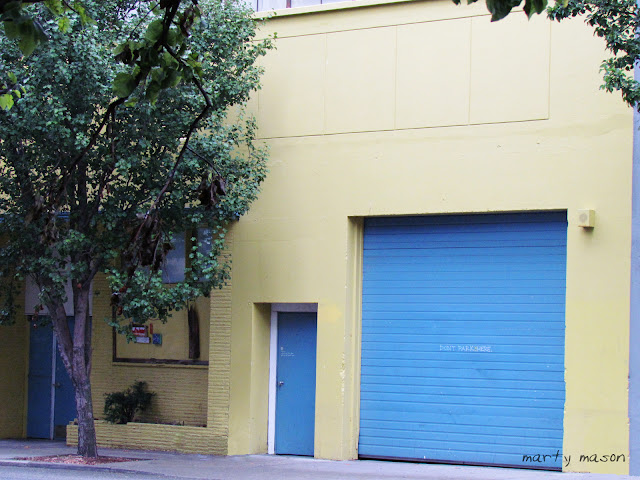
I took the time to walk some of the Austin streets and found color inspiration everywhere!


 This was a serendipity moment.  As I stood on the corner waiting for the "Walk" light, this pink and tan car, and analogous colored SUV stopped in front of the brightly painted restaurant.  For once, I was glad the light kept me waiting.  Yes, the right place at the right time.  I love this picture!


While in Austin, I took the time to walk the Sixth Street Historic District.
 Beautiful old architecture from the previous centuries.    


There's been no time for quilting


watercolor rendition of quilt block

I'm sure this block has a name; however, I don't know what it is.  I liked it enough to make another version.  A watercolor version will have to do since I don't have time just now to sit and sew.  I  have to admit, this version was much easier to make than my original block-based block!


unnamed quilt block....from block based


As a matter of fact, this was so easy, I may do another block or two in watercolor.  Sure saves on the thread.


Skill Builder BOM - blocks 3 and 4 COMPLETED


What a fun year I'm having since I presented myself the challenge of learning new techniques:  New sewing techniques, quilting techniques, photography, stamping, fabric making - so many new things with which to experiment.

I must admit that Alyssa presented me with a challenge on her Skill Builder blocks this month, but they are completed and I enjoyed the afternoon scratching my head over where to find the 58 degree line on my quilting ruler!!!!!

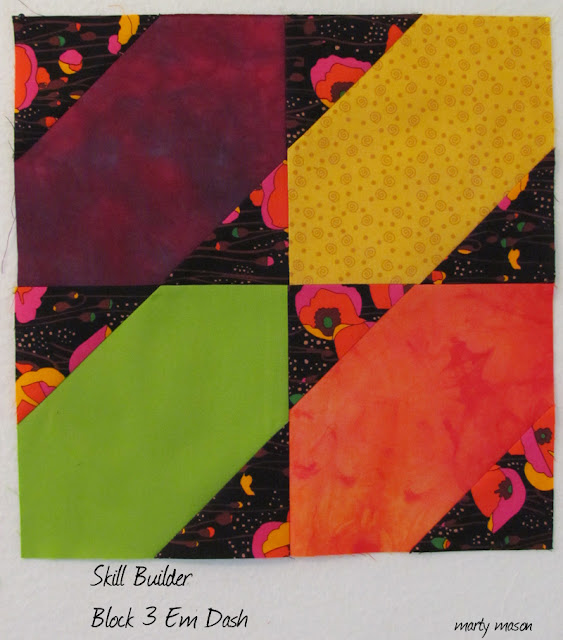
Enjoy Block No. 3 -  Em Dash:

Pile O' Fabrics Skill Builder BOM #3


And Block No. 4 - The Mood:  

Pile O' Fabrics Skill Builder BOM #4


I'll be off to Quilt Con on Wednesday and plan on meeting Alyssa in person.  I've so enjoyed her Pile O' Fabrics, so full of fabric, inspiration and how-to-do-its!


I'll name this post later ~


But for right now, I'm energized.  Wading into new water in Photoshop.  The window has always been there, but I've never opened it....until this morning.  It's called CONTENTS with so many choices:  content by shape or mood or color, object, seasons and more.

Wading into deep water, I took this picture of  Door No. 33....a beautiful doorway in Italy

Wood doorway in Italy


and this picture of my Skill Builder Block No. 3....EmDash that I finished yesterday.  


Skill Builder modern quilt block no. 3

I first, opened a new blank file with white background then brought in the EmDash picture.  Next, went to window, content, mood, and opened the mask of choice.  Grabbed my Door No. 33 picture and applied it.
On a roll now, I selected contents, objects and found the simple arrow and applied it then moved each layer into the perfect position.

EmDash was so new, modern and vibrant and I thought might make the perfect backdrop for the old, traditional and subdued door No. 33.  Combining the two was done with content mood rough mask 01 and further embellished with object arrow 03.


Just thought you'd want to know where I've been all morning!


Have Project Storage Bag.....Will Travel


I've been away for a few days....quilting retreat.   Four days of  sewing fun spent with 18 kindred spirits.  We laughed and ate, sewed a bit,  then started all over again.  Caught a nap or two in between projects.
 ~ ~ ~ and, speaking of projects,  upon returning from my trip, I whipped up four project bags this afternoon.


vinyl mesh zippered travel bag

For a large project bag, start with an 18" x 36" piece of vinyl bag mesh.. I found mine at Quilteroo's Quilt Shop in Ruston, Louisiana.    You'll also need a 20" zipper.

Cut the vinyl into two pieces:  One piece should be cut 18" x 19" which leaves the other piece at 18" x 17".  Sew one side of the zipper to the top of the mesh, then the other side of the zipper to the top of the second piece of mesh.  

vinyl mesh zippered travel bag


Stay stitch across the end of the zipper so you can cut the excess length without the zipper unraveling on you. Cut the zipper even with the edge of fabric.   Unzip the zipper at least half way, I usually go as far as 3/4 because it's easier to turn the bag once finished.

vinyl mesh zippered travel bag


With right sides together pin the bottom first.  Now pin each side.  You can see that the zipper will be offset from the top of the bag which seems to make it easier to open.....and adds a design element to the bag.  Did I mention that I used  zippers of different colors than the vinyl mesh!

Starting at the top, stitch around the side, bottom and the other side.    Trim to round the bottom corners, turn and you are done.  Make as many bags as you have projects to keep yourself organized.

I made three sizes....the smallest (12" x 7")  for thread, scissors, rotary cutter and so on for when I travel,  the largest (17" x 17") for all the fabric, notions and pattern for each quilt project I have and the medium (10" x 17") for a crochet or knit project for the car.  One 18" x 36" mesh piece made the medium and small project bags.

vinyl mesh zippered travel bag


I need more vinyl mesh!


have a heart.....


on such a winter's day

Words from the Rain
Keith Fowler             

                                                                 Poet’s, put down your

Pen, words drift to heaven
Above, gaining angels favors
Close weary eyes, wrap wounded
Hearts, dry moistened tears
Cease wandering trails of
Rhyme and reasons, turned
Inside out, fleshed touched
Journeys, come in from the
Cold, tomorrow calls from
Before the hall of days.


A Pin Cushion for the Swap:

QuiltCon is just around the corner and the fun has already begun.

Alyssa Lichner of Pile O' Fabrics extended a dinner invitation to those signed up for her Skill Builder BOM...and I accepted.

The dinner guests voted and  it was decided that we would all make a pin cushion to swap.    I have to stay on top of things:  If I procrastinate for too long, I forget to do what I'm suppose to do.   A perfect paper-pieced project for a rainy Sunday afternoon.   A little Kaffe Fassett fabric with some Kona Cotton.

Pin Cushion for Pile O' Fabrics swap


Eleven days and counting:

A Little Twister

Loving these little twister quilts, however!!!, today I had to stop and re-think my possibilities - my way of thinking about doll quilts.  After getting all my twister blocks put together, I had too may scraps left over to just chunk.  I sewed them together for an outer border....easy enough to do?  Right?  Well, that's when the twisting and shouting really started.   You see, I wanted the four corners to align perfectly with the quilt and it just wasn't gonna happen.  Finally I had to stop for my reality check.  It's just a doll quilt!

It's just a doll quilt and it's okay if the four corners don't exactly match!  Sure, it's okay.  So, there I've said it out loud, even announced it to all quilters (should they choose to read my post) that it's a doll quilt and to be quite honest, I don't really think the five year old or her baby doll will care, because I certainly don't care!  After ripping and re-ripping and measuring and re-measuring....I, truthfully, really don't care that the four corners don't match.  Really, I don't.

A little twister doll quilt 21" x 21"


Hope your Sunday is going well.  My neighbors are all out grilling for their soon-to-start Super Bowl party.  Now, I'm hungry!


I can park this baby anywhere ~

.....if you'll just  move out of my way before I back over you.....you smart A..!  trying to tell me:  woman, how to back this baby.  Okay, I've got it in reverse...now what?

 Money can't buy everything, but it sure can buy cute little sport cars.  Sigh ~ 

Street action in Italy